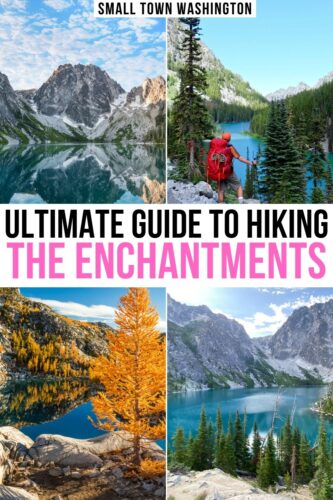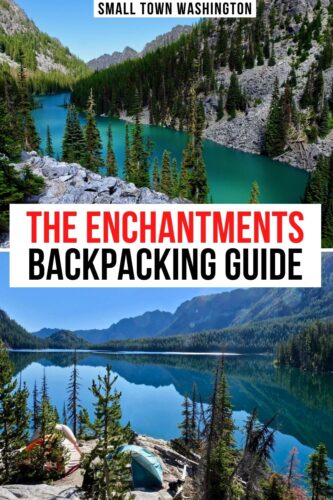
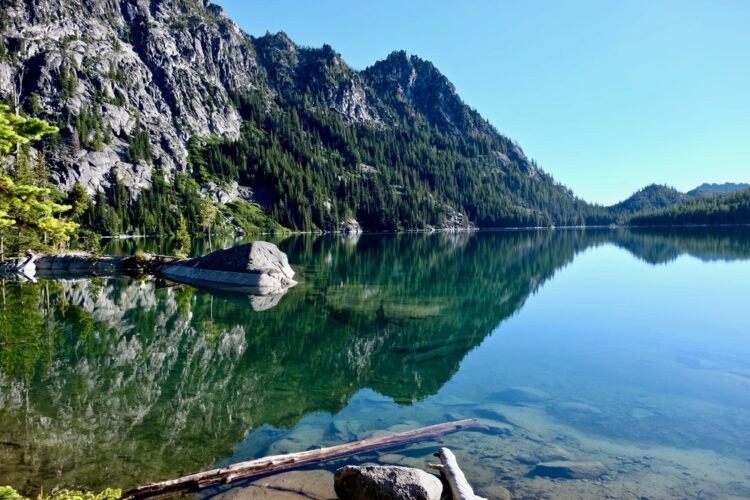
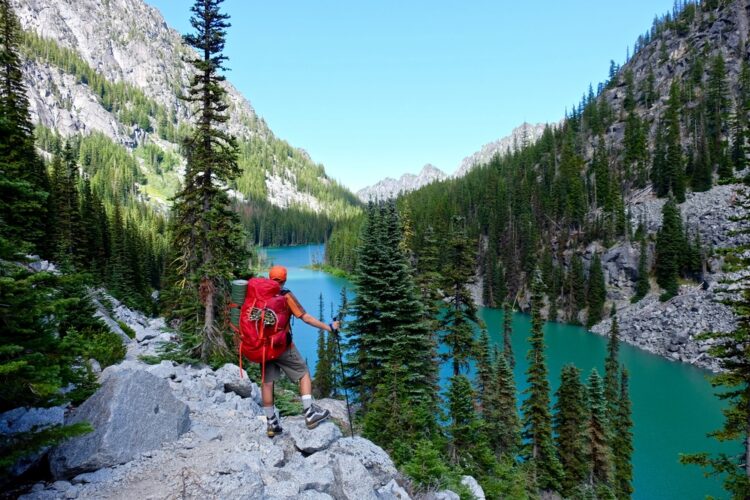
Backpacking the Enchantments is a very strenuous trip that (with the proper training!) will reward you with views of a lifetime. We’re talking beautiful wilderness full of clear alpine lakes, granite rocks, and vistas of sharp peaks.
Depending on your fitness and availability, the time for hiking the Enchantments trail varies. Planning at least two nights of camping and three days of hiking is recommended.
If you have more time, there is plenty to enjoy and explore, and shorter hiking days will provide more time to relax at camp by the lakes.
Quick Stats for the Enchantments Hike
Some links in this post may be affiliate links. If you make a purchase through one of these links, we may earn a small commission at no extra cost to you. Please see our disclosure policy for more detail.
Distance: 19 miles
Difficulty: Strenuous
Elevation Gain: 4,600 feet
Elevation Loss: 6,700 feet
Highest Elevation: 7,840 feet
Time: Multiple days
Securing an Enchantments Permit
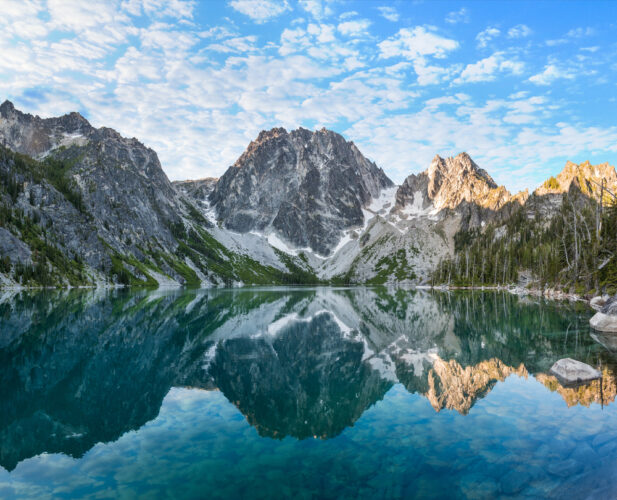
Most people prefer to backpack in the Enchantments during the summer months, to enjoy the clear blue lakes and granite rocks.
However, to go backpacking in the Enchantments between May 15 and October 31, you will need to secure a permit from the US Forest Service.
These permits can be difficult to secure, as most of them are drawn on a lottery. The best chances of obtaining a permit are to pick dates earlier or later in the season and avoid major holidays.
To enter the permit lottery, you will first need to apply during the annual permit lottery (exact dates vary by year). To apply, you will need to choose an entry date, group size, permit zone, assign an alternate group leader, and pay the application fee. The maximum group size is 8 people.
Once applications are drawn, there is a few-week period where successful applicants must accept their permit. At this time, applicants must choose an exit date and provide payment for the permits.
In addition to the lottery permits, a very limited number of permits are reserved for walk-ins available at the Leavenworth Ranger Station. To obtain one of these, you will need to arrive at the ranger station early in the morning on the day you wish to start your trip. However, don’t count on this as a guarantee — it is far better to try to secure an Enchantments permit in advance.
Permits and permit information is available on the Recreation.gov Portal.
Enchantments Permit Zones

The permits for the Enchantments area are divided into zones. There are five permit zones: Core Enchantment, Snow Lake, Colchuck Lake, Stuart Lake, and the Eightmile/Caroline zone.
A permit for the Core Enchantment zone allows overnight stays within any of the zones, making it the best choice for a hike through the Enchantments.
Seasonal Weather in the Enchantments
The below table is the monthly average temperatures for Leavenworth.
Since the Enchantments trail is at a higher elevation, the temperature will generally be cooler than in town.
However, since these are averages it is best to be prepared for a wide range of temperatures during your trip.
| Month | High / Low (F) |
| May | 72 / 41 |
| June | 79 / 47 |
| July | 88 / 52 |
| August | 88 / 51 |
| September | 78 / 43 |
| October | 64 / 34 |
You are likely to encounter snow in the Enchantments area between mid-October through mid-July, and during this time period you will want to pack microspikes for travelling on potentially slippery snow, especially when traveling on the steeper sections of the trail.
Depending on snow conditions, you may also want to bring gaiters to protect your boots from getting filled with snow.
The ideal time to hike the Enchantments trail for warm and dry weather is late July and August. These days experience the least precipitation and are most likely to have clear skies and warm days.
The lakes and rocks will be melted off, allowing you to fully see them. When the landscape is snow-covered, the lakes may be frozen and not distinguishable from the rest of the landscape.
During warm dry summer days in July and August, you will also need to be prepared for hot afternoons. To mitigate the heat, it is suggested that you start hiking early in the day and aim to arrive at your evening campsite before midday. This will give you time to cool off and avoid hiking in the heat of the day.
Regardless of the time of year of your hike, this is a mountainous alpine hike, and it is important to pack a range of layers for clothing, including enough warm layers in case the weather turns bad. The weather can change quickly during your multi-day trip from the original forecast.
Fitness & Preparation
A hike through the Enchantments is a very strenuous hike. The elevation gain and loss are large, meaning that you will be working hard at most points during your hike.
The trail through the Enchantments is also very rocky and uneven, further increasing the difficulty of the hike. Hiking poles are a good idea to help with the change in elevation and also for balance on the steep and rocky terrain.
If you choose to climb up Aasgard Pass, as recommended in this guide, you will be carrying a full overnight pack with the food up 2,000 feet of elevation gain in less than a mile.
Although this is difficult, many people prefer this option to hiking the other direction, which involves a much longer strenuous uphill section of trail. Hiking up Aasgard Pass means that the remaining 13 miles of trail are generally downhill.
Before setting out on this trip, make sure you are physically ready for a strenuous hike through the wilderness!
In addition to physical preparation, an understanding of wilderness travel and first aid will greatly improve your trip if anything goes wrong. There is little if any cell service available on this trail, and emergency help is far away.
If you do not have prior wilderness backpacking experience, first try some shorter trips to learn how to pack, improve your fitness level, and practice backpacking skills.
Not sure where to start? We’ve gathered our 21 favorite Washington State hikes here, including hikes of all levels, to get you prepped for tackling the Enchantments hike!
Another option is tapping into local hiking groups. Local groups often provide introductory courses on backpacking and camping, which would be good practice before embarking on an Enchantments trip. Prior experience will help prepare you for the Enchantments hike and make it more fun!
Trail Etiquette

This trail winds through a beautiful wilderness area that many other hikes enjoy. To preserve the experience of other hikers and the wilderness character of the trail, it is important to follow common hiking etiquettes. Here are some of these hiking courtesies that help improve everyone’s trip.
First, there is an accepted right-of way when hiking on a trail. Uphill hikers always have the right-of way, and downhill hikers who see approaching hikers should find a suitable spot to let the uphill hikers pass. When you are being approached by faster hikers from behind, it is also courtesy to let them pass.
Second, waste management in the Enchantments is difficult since the area receives a high amount of use.
Everything you bring in needs to be taken out – this includes trash, fruit peels, etc. Although some things may biodegrade over a long period of time, they do not belong in the alpine, they are unsightly and spoil the view of your fellow hikers, and they are unhealthy for animals who will eat them.
If you are cooking in the alpine, research proper techniques for cleaning pots and pans. It is never acceptable to clean pots by submerging them in a natural body of water. This informative video shows you how!
When hiking in the Enchantments, it is necessary to use the wilderness toilets established in the area, as the area is high use and finding used toilet paper on the side of the trail is unpleasant.
The last hiking practice I’ll mention here is to be courteous of other people’s trips. Camping spots are limited, but when possible, put your tent up away from other tents to give other campers privacy.
Hiking with music can be fun but it is good practice to use headphones so that other hikers don’t have to listen to it. Even if you don’t see other hikers, there are probably other people who can hear your music.
Trail Route
The trail through the Enchantments is 18 miles, one-way, with additional side trails to explore the surrounding lakes. The abundance of granite-carved lakes in the Enchantments makes the area a wonderful spot to explore at a leisurely pace.
Although the Enchantments hike can be done in two days, this hike is best done in at least three days, spending two nights camping within the permit zone. If you have more time, you won’t get bored spending more time in this beautiful area!
At one end, the hike begins at the Stuart Lake Trailhead. This is the recommended starting trailhead to hike through the Enchantments, as you will climb up the steep Aasgard Pass instead of scrambling down the steep trail. Up is easier than down, especially at the beginning of a long hike!
The route is described below beginning at the Stuart Lake Trailhead.
Colchuck Lake
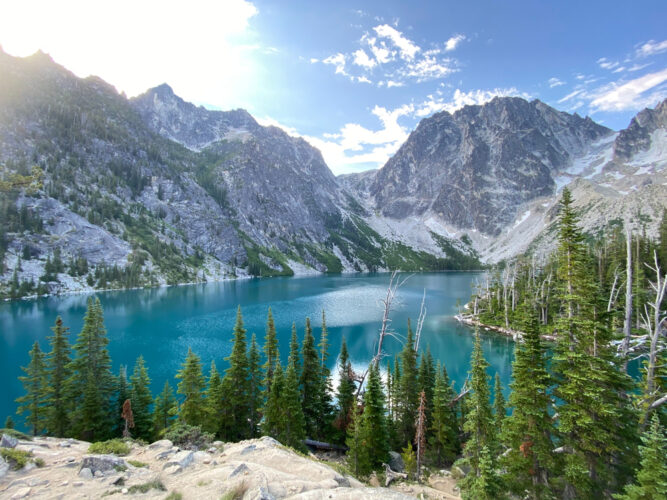
From the Stuart Lake Trailhead, the trail heads first towards Colchuck Lake – a 4-mile hike from the trailhead. This trail gains a modest amount of elevation, at 2300 feet, but this is just the beginning of the hike.
Once you reach Colchuck Lake, the trail proceeds around the edge of the lake, passing by the campsites until it crosses the boulder field on the other side of the lake and then begins the steep passage up Aasgard Pass.
Aasgard Pass
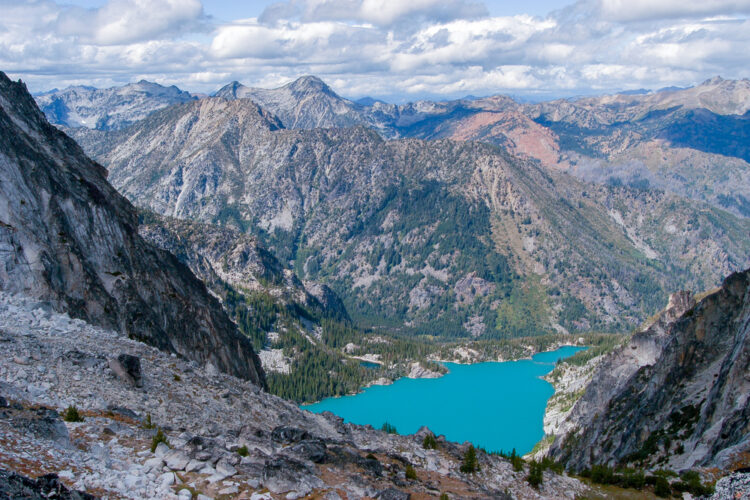
The trail up Aasgard Pass looks a little unlike a trail at times, with the steep terrain and loose footing requiring hands-and-feet scrambling to reach the top. The main path stays to the left of the waterfall but is not immediately next to the left rock cliffs.
It is easy to lose the main path up Aasgard Pass, but you will want to take the extra time to stay on it, since it is more solid and easier, especially if you are carrying a heavy overnight pack.
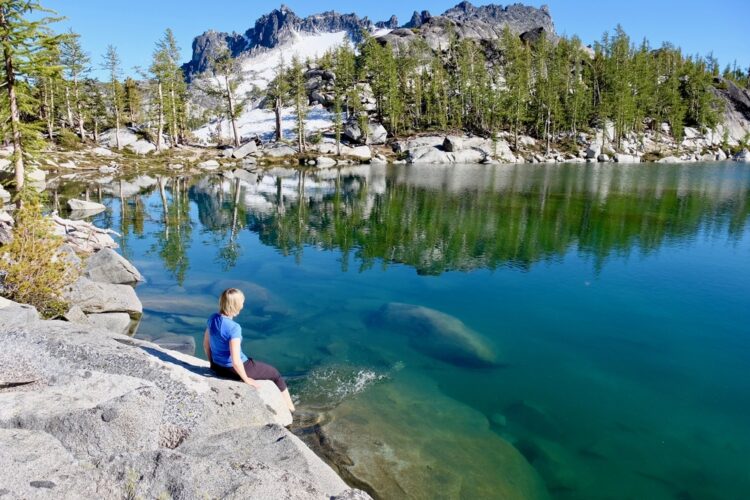
Isolation & Tranquil Lakes
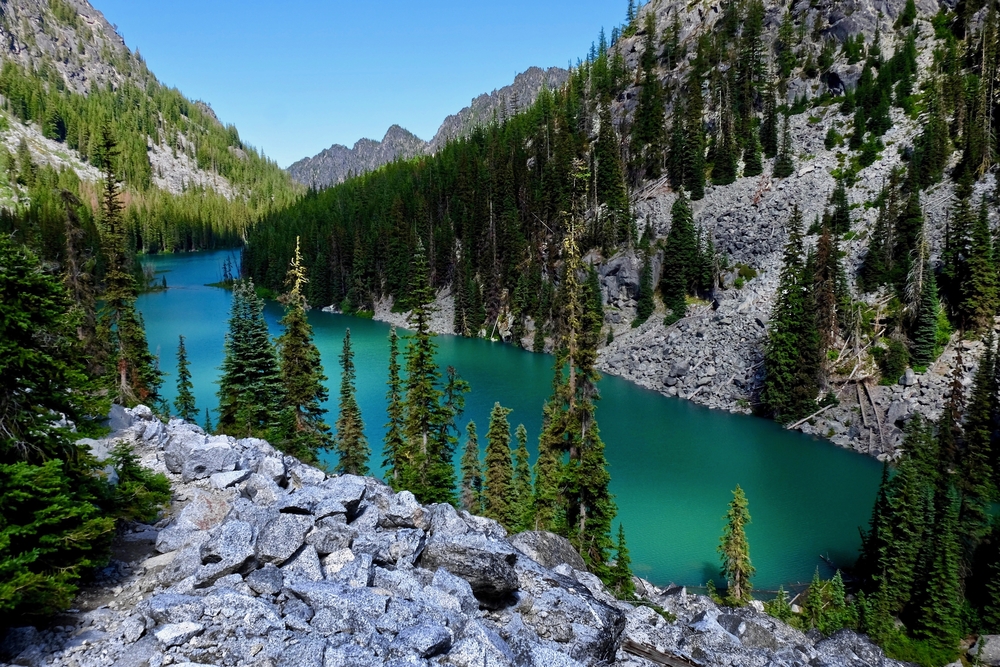
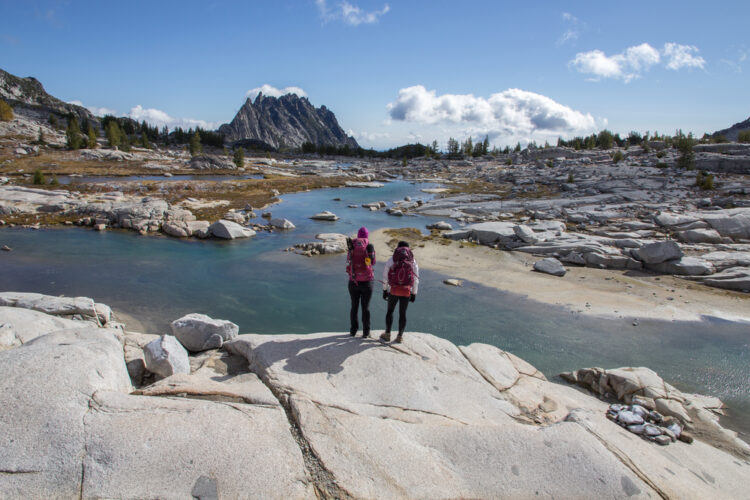
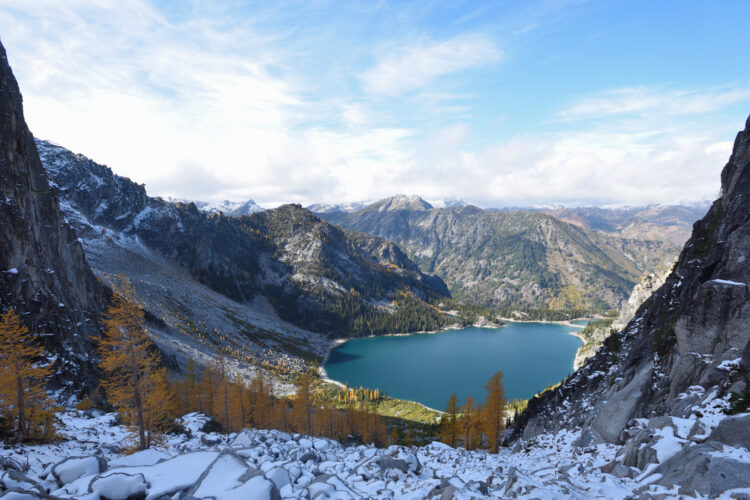
The climb up the pass is grueling, but once you make it, you will be blessed with the view of the Core Enchantment Zone – the granite rock and bright blue alpine lakes that make this place special.
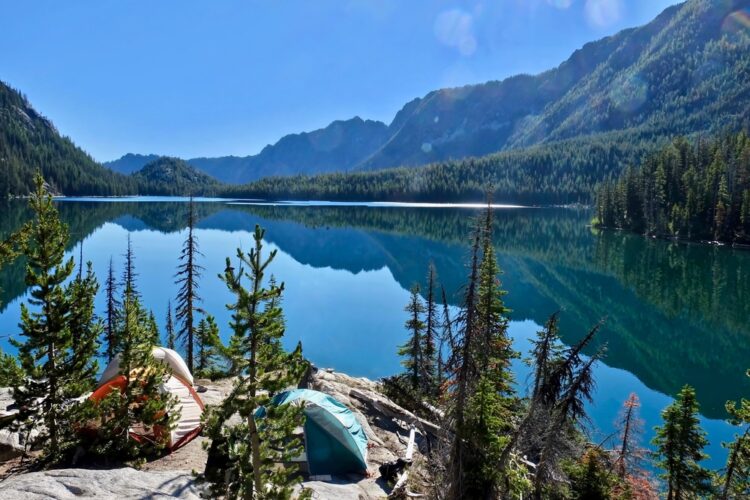
As the trail winds through the lakes surrounded by lichen-covered rocks beneath the rugged mountain peaks, you will find more campsites.
Once here, depending on your schedule, you may want to camp overnight. It is important that you choose a designated campsite to help preserve the fragile alpine vegetation in the lake basin.
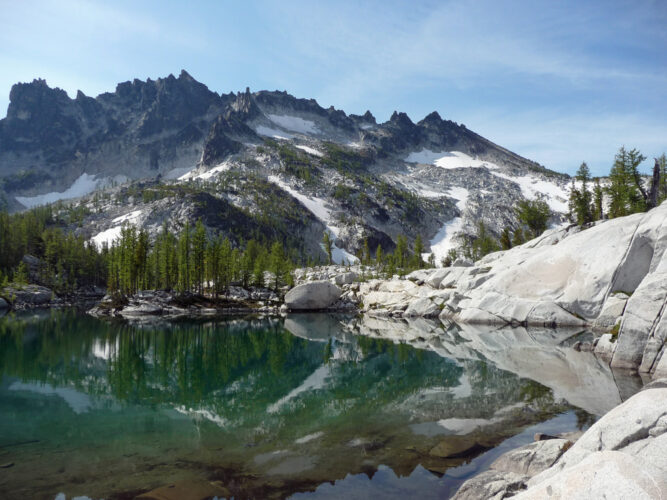
Inspiration & Perfection Lake
As you head down from Isolation and Tranquil Lakes, the terrain changes from the smooth granite rocks to alpine meadows.
The trail down to Inspiration Lake is steep – the first taste of the downhill you will encounter on the remaining trail.
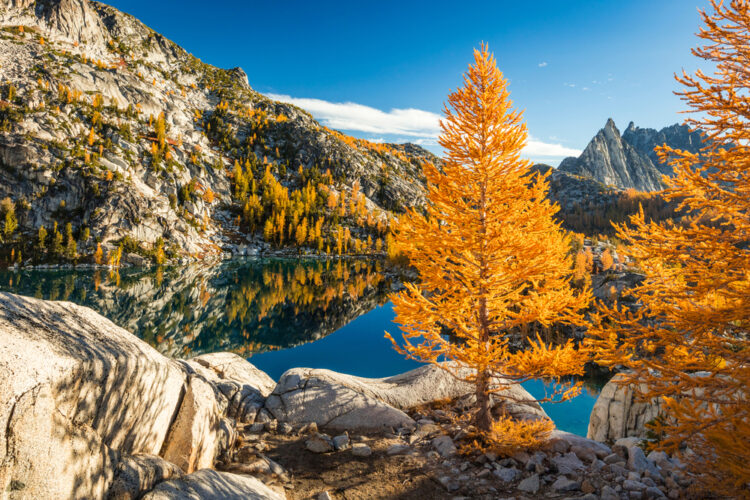
Inspiration Lake is tucked away in a pool surrounded by steep granite on three sides. Here you will also encounter larches, the iconic coniferous tree with deciduous needles that turn bright yellow before they drop for the winter.
In the summer, these will look like any other green coniferous tree unless you look for the distinctive bundles of needles coming off the branches.
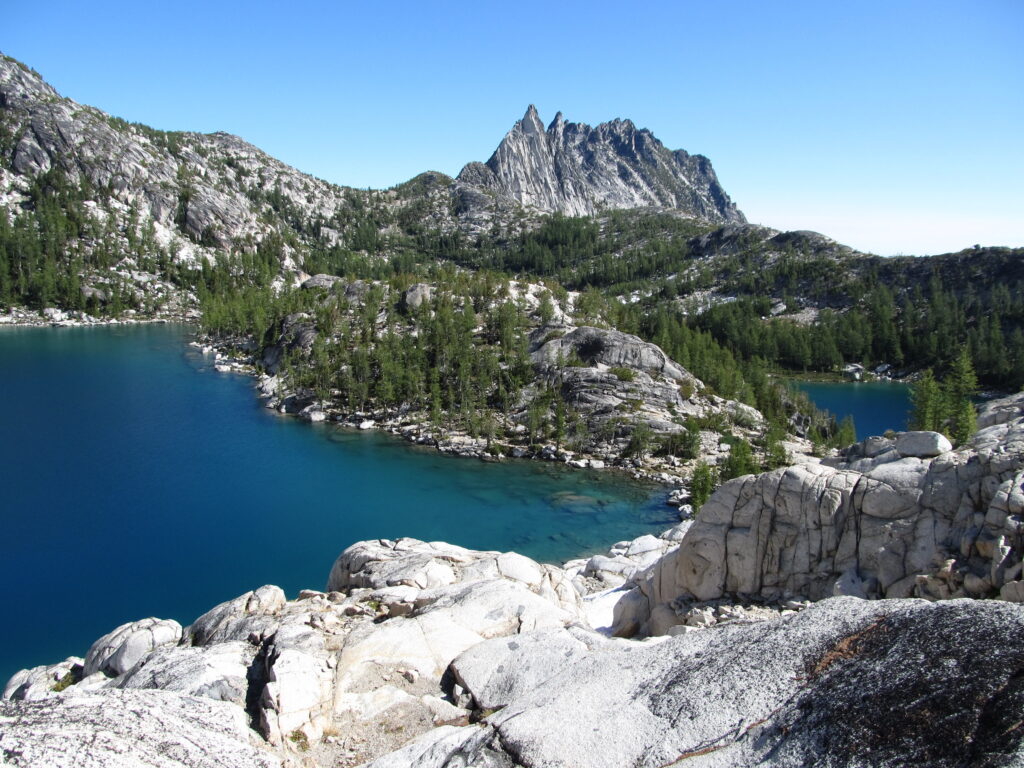
Perfection Lake is another clear, shallow alpine lake, perhaps more beautiful than the previous ones (hence its name, perhaps!). The environment here has turned from granite rocks to alpine marsh and meadow, full of grass and heather.
For a challenging side adventure, there is a trail that branches off near Perfection Lake and heads up Prusik Pass. The trail is steep and rocky, resembling your climb up Aasgard Pass.
Leprechaun Lake & Lake Viviane
Once the trail reaches Leprechaun Lake, you are in the Lower Enchantment area, a section marked by narrow rock ledges and the towering McClellan Peak.
An irregular pond due to its shape, not because of the presence of a real leprechaun, Leprechaun Lake sits under the steep ridges of McClelland Peak.
As you proceed down the trail, the next and final lake of the Enchantments is Lake Viviane. This lake is one of the most dramatic lakes in the basin, as it is set in a deep basin below Prusik Peak and above the ridge towards Snow Lakes.
Snow Lakes & Nada Lake
From Lake Viviane, the trail descends steeply down towards the Snow Lakes. The trail crosses over a wooden bridge at this point, marking the end of the Enchantment Lakes basin.
Don’t be fooled that you are reaching the end here, even though you are leaving the lake basin!
The descent from here is long and tedious, and the large decline in elevation challenges most hikers. The trail continues to be rocky and steep and several sections require scrambling using both hands and feet.
As you descend, you will reach Snow Lakes and Nada Lake, both with a variety of campgrounds for the weary hiker. This can be a good place to plan for a night of rest if downhill hiking presents difficulty.
Whenever you decide to continue on, be prepared for continuation of the rocky trail. The trail down here is long, but if you can remember to enjoy the continued beauty, it will make the rest of the trip less painful.
Where to Camp in the Enchantments
There are several campsites located along the way, and where you end up choosing to camp in the Enchantments will depend on availability and your planned mileage each day.
To help plan your trip, here are the approximate locations of some of the most common campsites along the trail. Each campsite listed has a wilderness toilet for your use and to preserve the natural beauty of the area.
Mile 4: There are many campsites at Colchuck Lake around mile 4 from the trailhead. These campsites are located along the shoreline and provide excellent views of the brilliantly blue lake. This is a great campsite if you are planning a short first day of hiking.
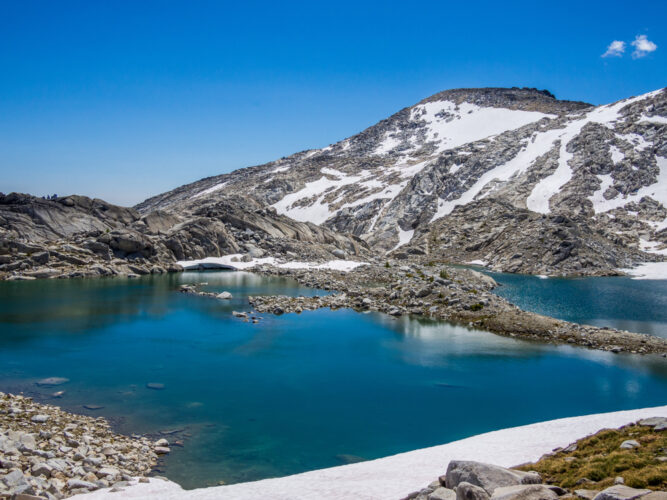
Mile 6: Once you pass Colchuck Lake, you will have to ascend Aasgard Pass before finding the next campsites near Isolation and Tranquil Lakes. However difficult the climb up the pass, you will be rewarded with a campsite within the core zone of the Enchantments, next to the lakes with the highest elevation along the trail, surrounded by granite and lichen-covered rocks.
Mile 7: The next campsites are located just below the Upper Enchantment Lakes just before the trail descends down the ridge. These campsites provide excellent views of Little Annapurna, one of the tallest peaks along the trail, and an opportunity for a scrambling side-trip if you are feeling adventurous.
Mile 8: Just below Inspiration Lake is another group of campsites. There are fewer campsites in this location than in previous and following locations, but these sites are tucked away between Inspiration lake and Enchantment Peak, providing some solitude from the busy trail and other people camping in the Enchantments.
Mile 9: The next major group of campsites are located between Leprechaun Lake and Lake Viviane. These campsites are located after the beginning of the steepest descent on the trail, a great Enchantments camping location to rest your knees for the continued descent during the next day.
Mile 11: The shores of the Snow Lakes are the last large group of campsites. This campsite location puts you in a great position to finish the hike the next day and return home.
Mile 13.5: If you prefer to travel a litter further on your final day, a few campsites are located near Nada Lake. This is the last Enchantments campsite location on the way out to the end of the trail.
Wildlife on an Enchantments Hike
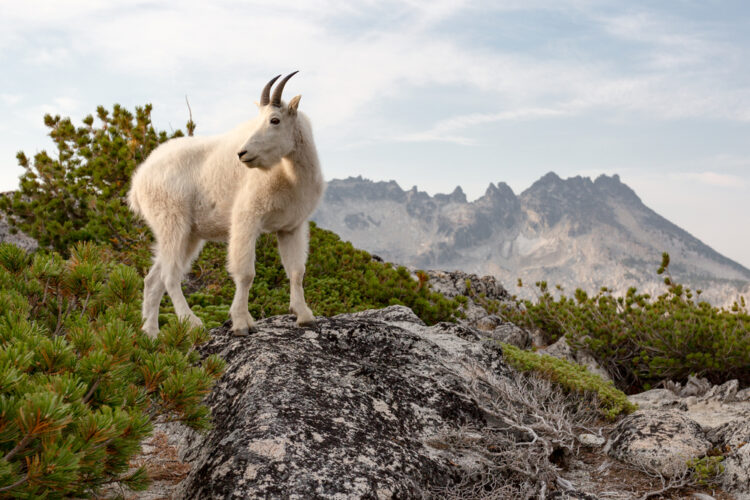
The Enchantments area is full of wildlife, and you have a high chance of seeing wildlife on your visit – including mountain goats, squirrels, marmots, pika, and marten.
While taking pictures and enjoying the company, you will need to keep your distance to keep yourself and the animals safe. Wildlife in the area is accustomed to visitors, making it easy to get good pictures of any you spot during your trip.
The mountain goats in particular are habituated to visitors. They can be overly friendly, to the point of dangerous, and often follow visitors in an attempt to lick up salt from human urine (delightful, huh?)!
Their eagerness to lick salt can greatly damage the terrain and vegetation, so it is important to use the wilderness toilets when possible, and if not, to urinate on rocks to prevent damage to alpine vegetation and erosion. The best strategy is to keep your distance as much as possible.
The smaller creatures in the Enchantments – marmots, pikas, marten, squirrels – are used to finding human food around backpacks and tents.
Although bears are not commonly sighted, they are present in the area and may also try to get into food.
To avoid these food thieves when camping or hiking through, you’ll want to keep your food in an animal-proof container. Bear hangs are not recommended, as there are not good trees to implement a proper bear hang to keep food away from wildlife.
Driving Directions & Shuttle
The Enchantments hike is most commonly completed as a one-way thru-hike since the hike is long and the terrain can be difficult. This means that you will start at one trailhead and end your hike at another, without retracing your steps.
Starting your hike at the Stuart Lake trailhead as I recommend, you will need to find a ride back to this trailhead from the Snow Lakes trailhead.
You may be able to find a ride back to the Stuart Lake trailhead from someone else completing their hike, but for overnight trips, most people leave a car at both trailheads.
Obviously, for this, you will need two drivers in your party and two cars!
To do the car shuttle, you will need to first drop a car off at the Snow Lakes trailhead, then gather at the Stuart Lakes Trailhead to begin your hike. At the end of your trip, you will use the car at the Snow Lakes trailhead to return to the car you left at the Stuart Lakes trailhead.
To reach the Snow Lakes trailhead to drop a car for your return trip, you will need to head into Leavenworth. As you approach Leavenworth from the west on Highway 2, you will turn onto Icicle Creek Road on the edge of town. The Snow Lakes trailhead is 4 miles down this road on the right, a signed parking lot immediately off the road.
Leave a car here for your return and continue down Icicle Creek Road towards the Stuart Lake Trailhead. Drive 4 miles past the Snow Lakes parking lot until you reach FS Road 7601. Take a left at this intersection, then follow the dirt road for 4 miles until reaching the Stuart Lake trailhead.
With your permit you will receive special parking permits for each of the trailhead, allowing you to park in designated spots for permitees. This is the most recent attempt to mitigate the parking shortage at the trailheads. The parking lots have very limited parking even with these designated spots, so it is a good idea to arrive as early as possible. You may also be able to snag a spot later in the evening when day hikers are leaving.
What to Pack for Hiking the Enchantments
For this multi-night backpacking adventure, make sure you are prepared with the right gear. Regardless of the weather you will need to be prepared for fluctuating temperatures and potential storms. Here is a sample packing list for your trip
- Permit, printed at home before arriving
- Printed maps and navigation tools
Overnight Gear
- Tent
- Backpacking Pack
- Sleeping Bag / Sleeping Pad
Clothing
- Warm clothes & extra layers
- Rain Jacket
- Hat
- Hiking Boots
Safety / Protection
- Microspikes & gaiters, if hiking when there might be snow
- Sunglasses
- Headlight
- Hiking Poles
- Bug Repellent
- First aid kit
Consumables & Kitchen
- At least 2 L of water carrying capacity
- Water filter
- Enough food for your trip
- Stove & Fuel
- Cooking pot
- Bowl & utensils
- Bear Bag or Bear Can (to store food)
Read Next
More Hiking: 21 Bucket List Hikes in Washington State
More North Cascades: 15 Best Hikes in North Cascades National Park
Waterfall Hikes: 11 Best Waterfalls in Washington State + Hikes to Find Them
Hiking Near Seattle: 11 Best Day Hikes Near Seattle